46
ศูนย์รวมวิธีใช้งาน และ ความรู้ต่าง ๆ / การตั้งค่าระบบ WP Super Cache ของ Wordpress
« เมื่อ: กันยายน 23, 2016, 23:40:13 »
การตั้งค่าระบบ WP Super Cache ของ Wordpress
บทความนี้จะมาบอกว่าทำไมในการทำเวปไซต์ด้วย Wordpress จำเป็นต้องทำ Caching ทำแล้วช่วยอะไรได้
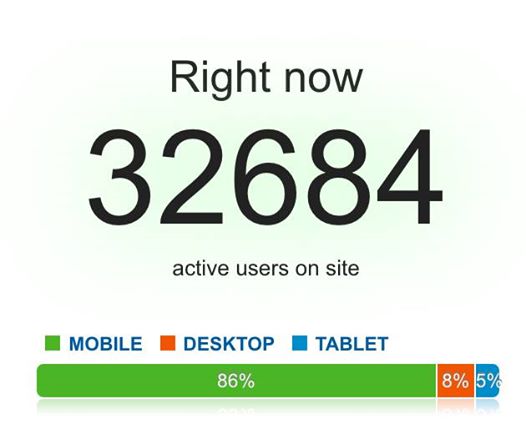
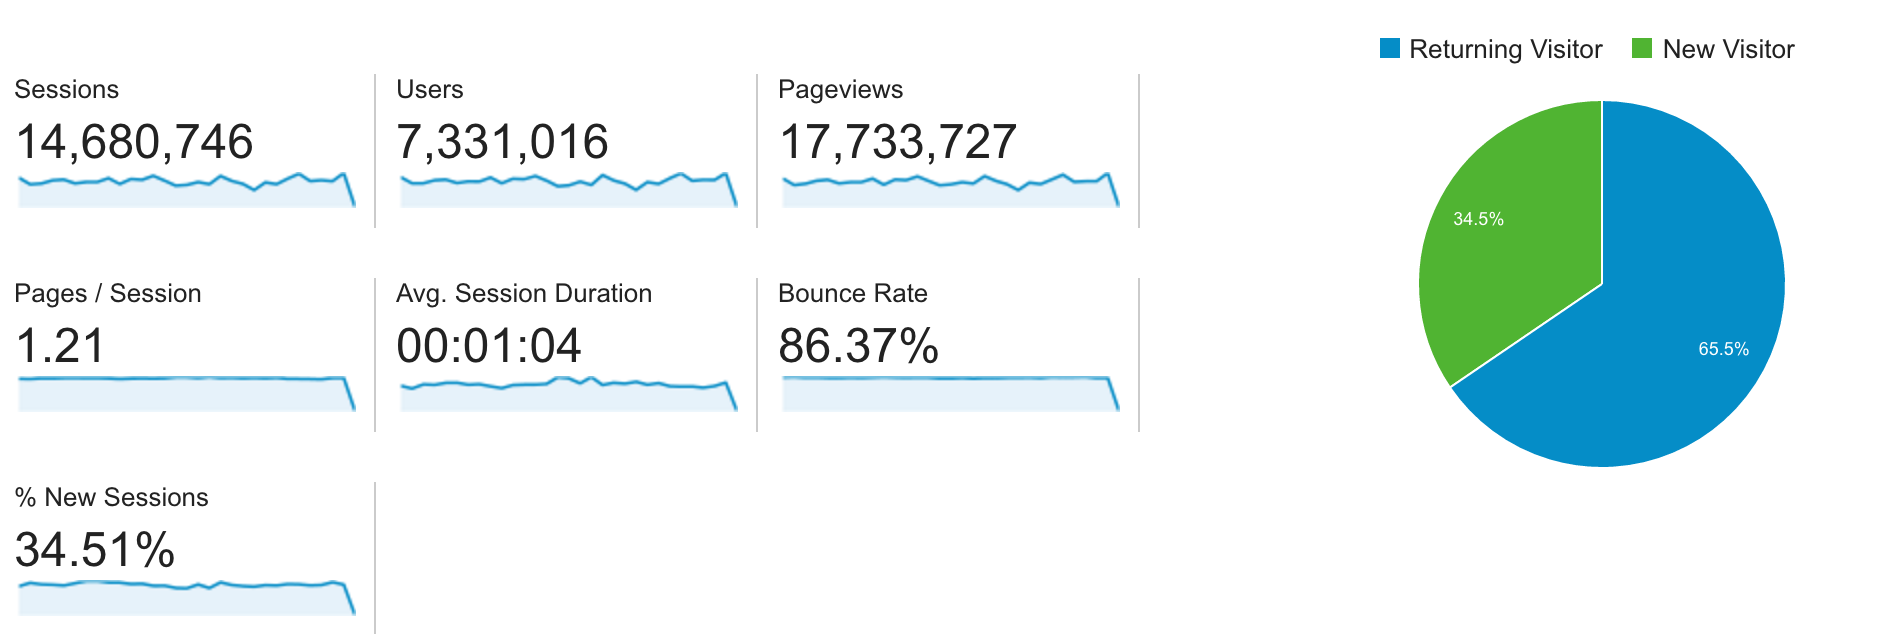
Wordpress เป็น CMS ที่ค่อนข้างใหญ่และมีโครงสร้างซับซ้อน ในการ query หรือค้นหาข้อมูลมาแสดงหน้าเวปแต่ละครั้งจะผ่าน function ต่างๆเยอะแยะมากมาย หากคนเข้าเวปน้อยๆก็จะยังไม่เห็นปัญหาแต่ถ้ามีการใช้งาน (realtime) หลักพันหรือหลักหมื่น หากไม่มีระบบ Cache เข้ามาช่วย เซิฟเวอร์แรงแค่ไหนก็เอาไม่อยู่ครับ
Plugin ที่บริหารจัดการ Caching ของ Wordpress มีมากมายในท้องตลาด แต่เราได้ทดสอบเป็นอย่างดีแล้วว่าถ้าเราตั้งค่าอย่างถูกต้องก็จะสามารถใช้งานได้เต็มประสิทธิภาพของเซิฟเวอร์ นั่นคือ WP Super Cache ด้วยการตั้งค่าที่ง่ายและ Plugin ไม่มีความซับซ้อนมาก
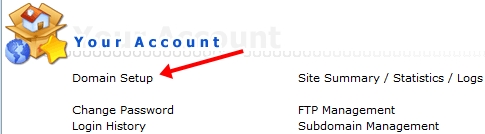
ขั้นตอนการตั้งค่า WP Super Cache
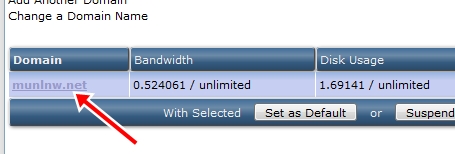
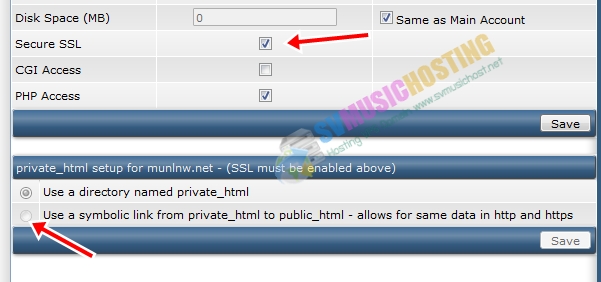
ปรับแต่ง permalink เพื่อให้รองรับกับการ cache ด้วย mod_rewrite
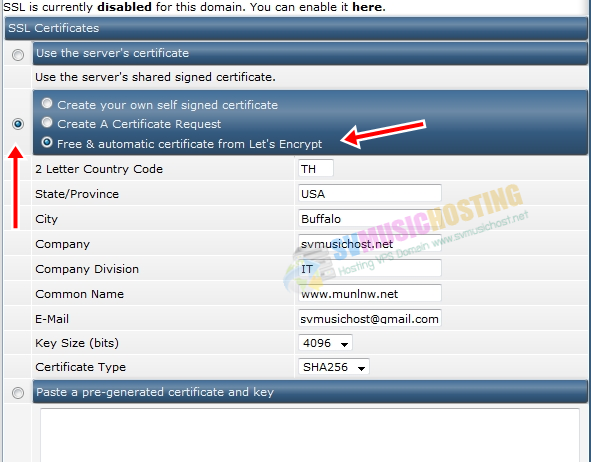
เพื่อให้การตั้งค่าได้ถูกต้องแนะนำให้เลือก Plan แล้วกด Save หลังจากนั้นลบไฟล์ .htaccess ทิ้ง แล้วค่อยเลือก Custom Structure (ตามภาพด้านบน) ในที่นี้ผมอยากให้ URI ของเวปไซต์สั้นๆ เลยตั้งค่าแค่ /%post_id% หรือใครชอบให้มีหัวข้อของเนื้อหาอยู่ในบทความก็อาจจะตั้งเป็น /%postname% ก็แล้วแต่ความชอบและความเชื่อหรือเทคนิคเกี่ยวกับ SEO ครับ ^ ^
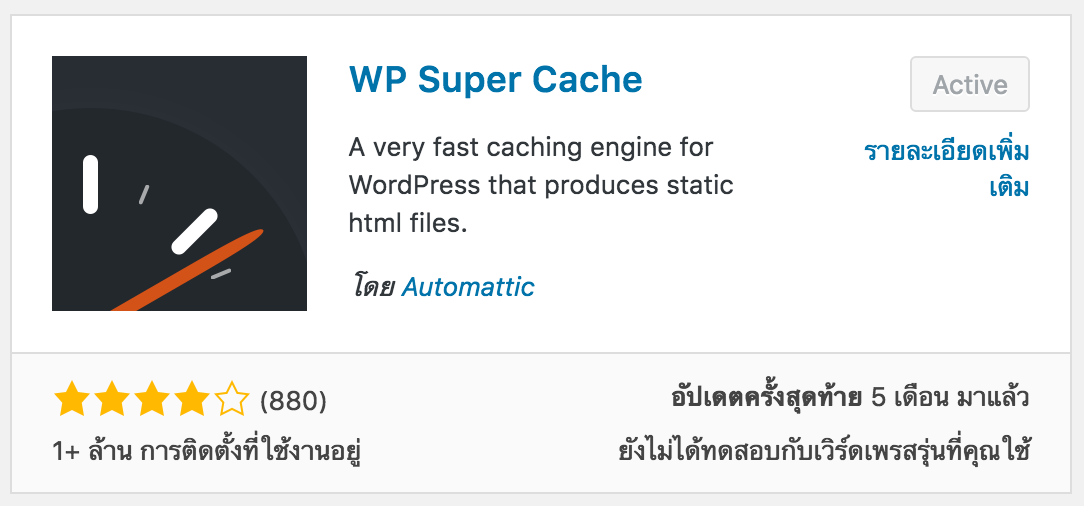
ต่อไปติดตั้ง Plugin WP Super Cache
โดยทำการตั้งค่าดังนี้
แนะนำให้เลือกเป็น mod_rewrite เพราะเป็น mode ที่ทำงานได้เร็วที่สุด
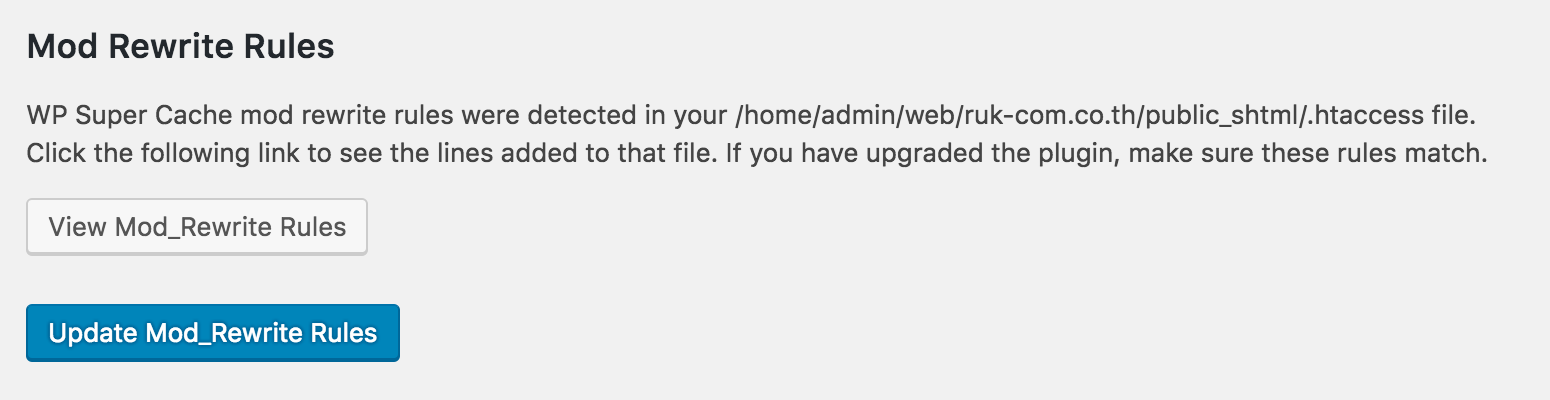
หลักๆให้เลือกที่ทาง Plugin Recommended มาครับและเพิ่มในส่วนของการให้ Clear Cache เมื่ออัพเดทบทความใหม่ ส่วนค่าที่เหลือสามารถใช้งาน Default ได้เลยครับ เสร้จแล้วกด update mod_rewrite rule ตามภาพด้านล่าง
หลังจากติดตั้ง Plugin เสร็จแล้วแนะนำเพิ่มเติมคือให้ทำการตั้งค่าไม่ให้ Wordpress เรียก 404.php ของ Themes เพราะในส่วนนี้จะไม่ cache และส่วนใหญ่โดย default ของ Themes จะมีการ query ทั้ง header, menu , widget เป็นจำนวนมาก ลองเข้าไปดู 404.php ของ Themes ที่ใช้ได้ที่
Appearance -> Editor -> 404.php ปกติผมจะทำการลบ Code ในนี้ด้วยและใส่เพียงแค่
<?="404 not found"; ?>
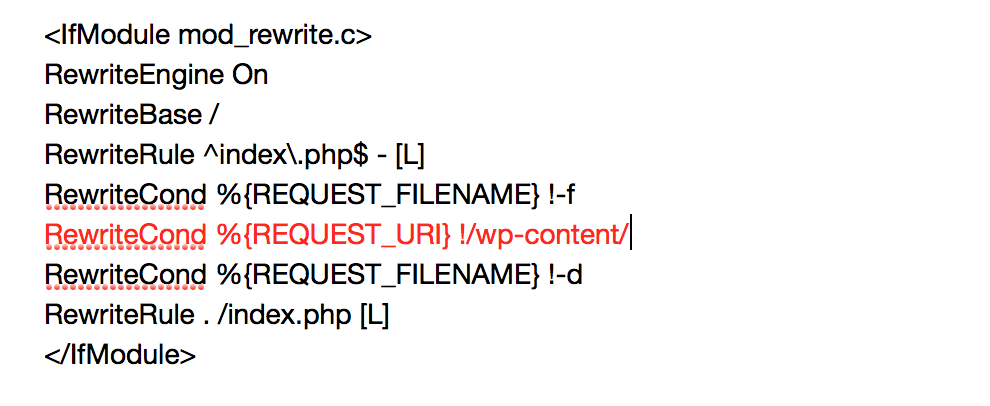
และแก้ไข .htaccess ไม่ให้มีการ execute ไฟล์ใน wp-content โดยเพิ่มบรรทัดสีแดงเข้าไปดังนี้
ในส่วนของการติดตั้ง Cache ก็เรียบร้อยแล้วครับ
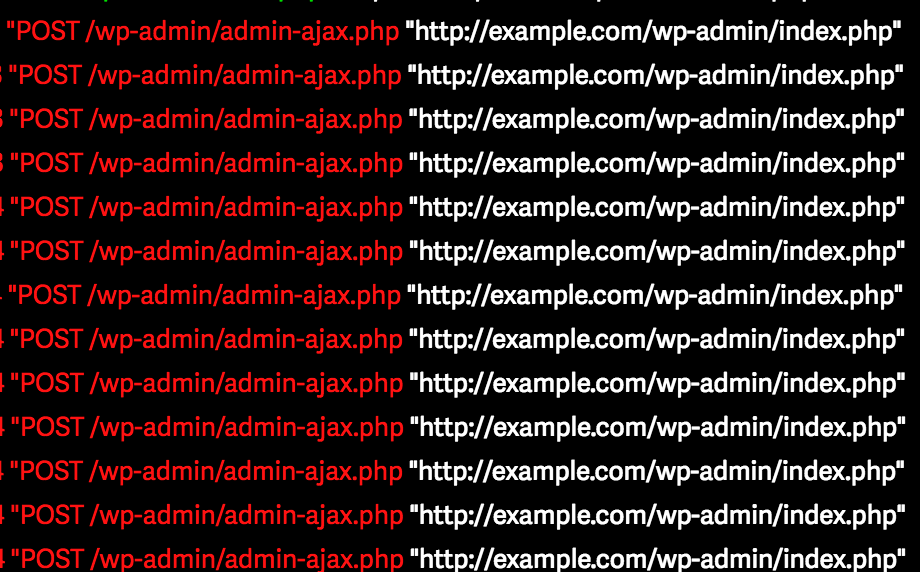
เพิ่มเติมให้อีกนิดครับในบาง Themes จะมีการส่งค่า POST ไปที่ admin-ajax.php ตลอดเวลาเท่ากับว่าทุกๆ 1 request จะมีการส่งค่าเข้าไปให้ Web Server ประมวลผลเป็นจำนวนมากทำให้กินทรัพยากรเซิฟเวอร์ เราแก้ไขได้ด้วยการติดตั้ง Plugin Heartbleed Control และตั้งค่าตามนี้ได้เลยครับ
ภาพตัวอย่างการส่ง POST request จำนวนมาก หาก Themes หรือ Plugin บางตัวมีการเรียก heartbeat API
บนความจาก https://hosti...ruk-com..nowled...Com-Cach..ss.html
เพิ่มเติม
http://www.icez.net/blog/135125/wordpress-superior-and-suck
http://www.inmotionhosting.com/support/website/wordpress/heartbeat-ajax-php-usage
บทความนี้จะมาบอกว่าทำไมในการทำเวปไซต์ด้วย Wordpress จำเป็นต้องทำ Caching ทำแล้วช่วยอะไรได้
Wordpress เป็น CMS ที่ค่อนข้างใหญ่และมีโครงสร้างซับซ้อน ในการ query หรือค้นหาข้อมูลมาแสดงหน้าเวปแต่ละครั้งจะผ่าน function ต่างๆเยอะแยะมากมาย หากคนเข้าเวปน้อยๆก็จะยังไม่เห็นปัญหาแต่ถ้ามีการใช้งาน (realtime) หลักพันหรือหลักหมื่น หากไม่มีระบบ Cache เข้ามาช่วย เซิฟเวอร์แรงแค่ไหนก็เอาไม่อยู่ครับ
Plugin ที่บริหารจัดการ Caching ของ Wordpress มีมากมายในท้องตลาด แต่เราได้ทดสอบเป็นอย่างดีแล้วว่าถ้าเราตั้งค่าอย่างถูกต้องก็จะสามารถใช้งานได้เต็มประสิทธิภาพของเซิฟเวอร์ นั่นคือ WP Super Cache ด้วยการตั้งค่าที่ง่ายและ Plugin ไม่มีความซับซ้อนมาก
ขั้นตอนการตั้งค่า WP Super Cache
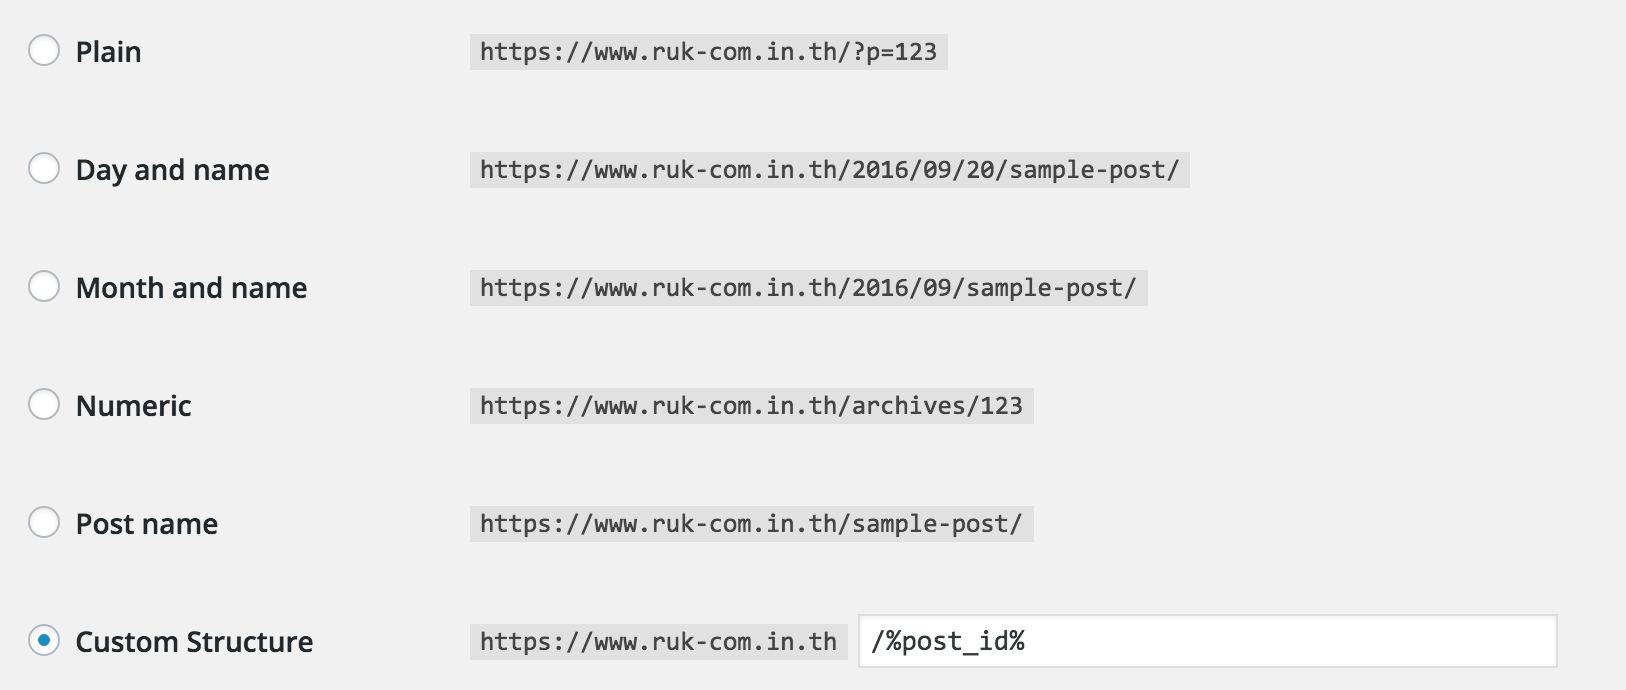
ปรับแต่ง permalink เพื่อให้รองรับกับการ cache ด้วย mod_rewrite
เพื่อให้การตั้งค่าได้ถูกต้องแนะนำให้เลือก Plan แล้วกด Save หลังจากนั้นลบไฟล์ .htaccess ทิ้ง แล้วค่อยเลือก Custom Structure (ตามภาพด้านบน) ในที่นี้ผมอยากให้ URI ของเวปไซต์สั้นๆ เลยตั้งค่าแค่ /%post_id% หรือใครชอบให้มีหัวข้อของเนื้อหาอยู่ในบทความก็อาจจะตั้งเป็น /%postname% ก็แล้วแต่ความชอบและความเชื่อหรือเทคนิคเกี่ยวกับ SEO ครับ ^ ^
ต่อไปติดตั้ง Plugin WP Super Cache
โดยทำการตั้งค่าดังนี้

แนะนำให้เลือกเป็น mod_rewrite เพราะเป็น mode ที่ทำงานได้เร็วที่สุด
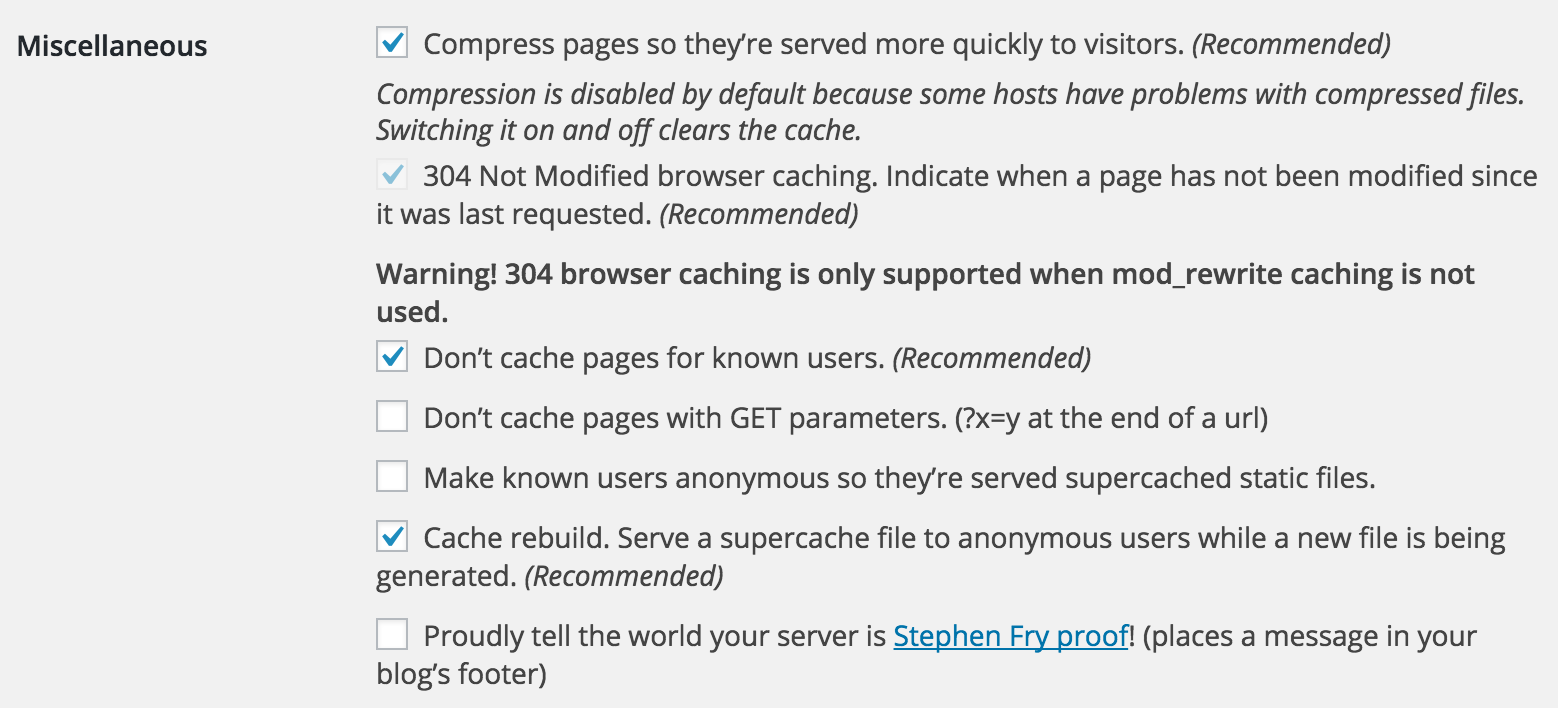
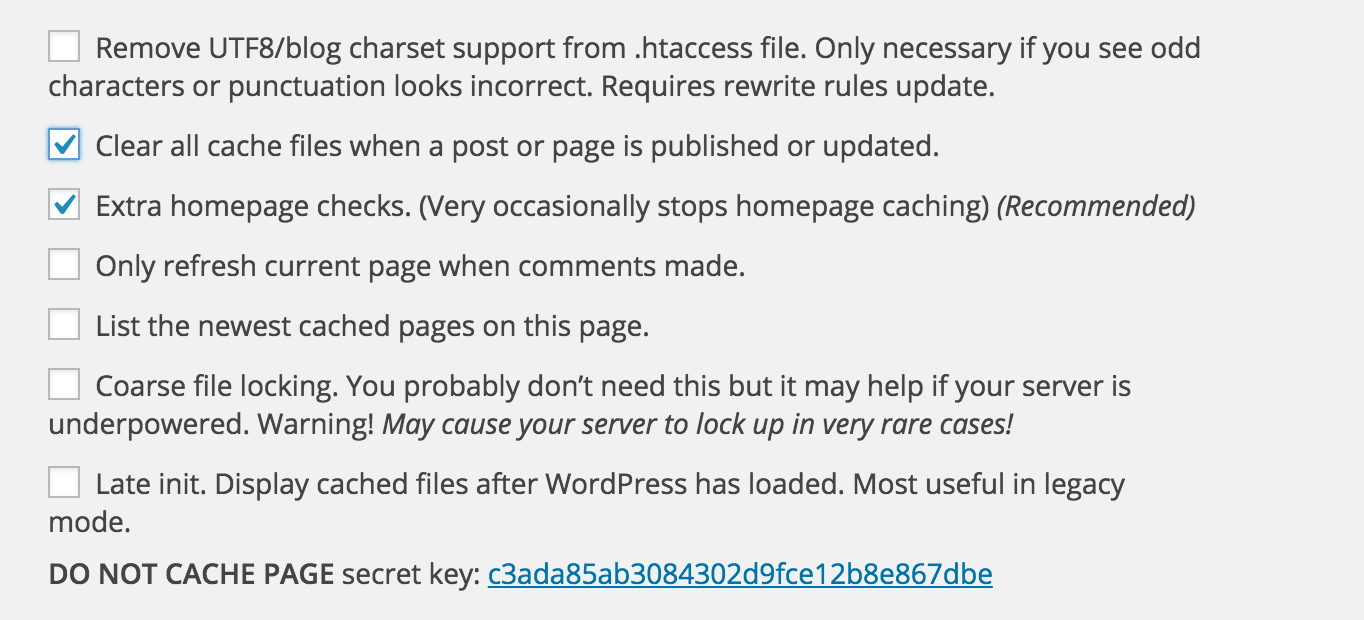
หลักๆให้เลือกที่ทาง Plugin Recommended มาครับและเพิ่มในส่วนของการให้ Clear Cache เมื่ออัพเดทบทความใหม่ ส่วนค่าที่เหลือสามารถใช้งาน Default ได้เลยครับ เสร้จแล้วกด update mod_rewrite rule ตามภาพด้านล่าง
หลังจากติดตั้ง Plugin เสร็จแล้วแนะนำเพิ่มเติมคือให้ทำการตั้งค่าไม่ให้ Wordpress เรียก 404.php ของ Themes เพราะในส่วนนี้จะไม่ cache และส่วนใหญ่โดย default ของ Themes จะมีการ query ทั้ง header, menu , widget เป็นจำนวนมาก ลองเข้าไปดู 404.php ของ Themes ที่ใช้ได้ที่
Appearance -> Editor -> 404.php ปกติผมจะทำการลบ Code ในนี้ด้วยและใส่เพียงแค่
<?="404 not found"; ?>
และแก้ไข .htaccess ไม่ให้มีการ execute ไฟล์ใน wp-content โดยเพิ่มบรรทัดสีแดงเข้าไปดังนี้
ในส่วนของการติดตั้ง Cache ก็เรียบร้อยแล้วครับ
เพิ่มเติมให้อีกนิดครับในบาง Themes จะมีการส่งค่า POST ไปที่ admin-ajax.php ตลอดเวลาเท่ากับว่าทุกๆ 1 request จะมีการส่งค่าเข้าไปให้ Web Server ประมวลผลเป็นจำนวนมากทำให้กินทรัพยากรเซิฟเวอร์ เราแก้ไขได้ด้วยการติดตั้ง Plugin Heartbleed Control และตั้งค่าตามนี้ได้เลยครับ

ภาพตัวอย่างการส่ง POST request จำนวนมาก หาก Themes หรือ Plugin บางตัวมีการเรียก heartbeat API
บนความจาก https://hosti...ruk-com..nowled...Com-Cach..ss.html
เพิ่มเติม
http://www.icez.net/blog/135125/wordpress-superior-and-suck
http://www.inmotionhosting.com/support/website/wordpress/heartbeat-ajax-php-usage